2H Media

Adding Custom Pages in Shopify

How to Add Custom Pages to Your Online Store in Shopify Online Store 2.0
Intermediate Shopify
Other Guides

Introduction

What To Expect

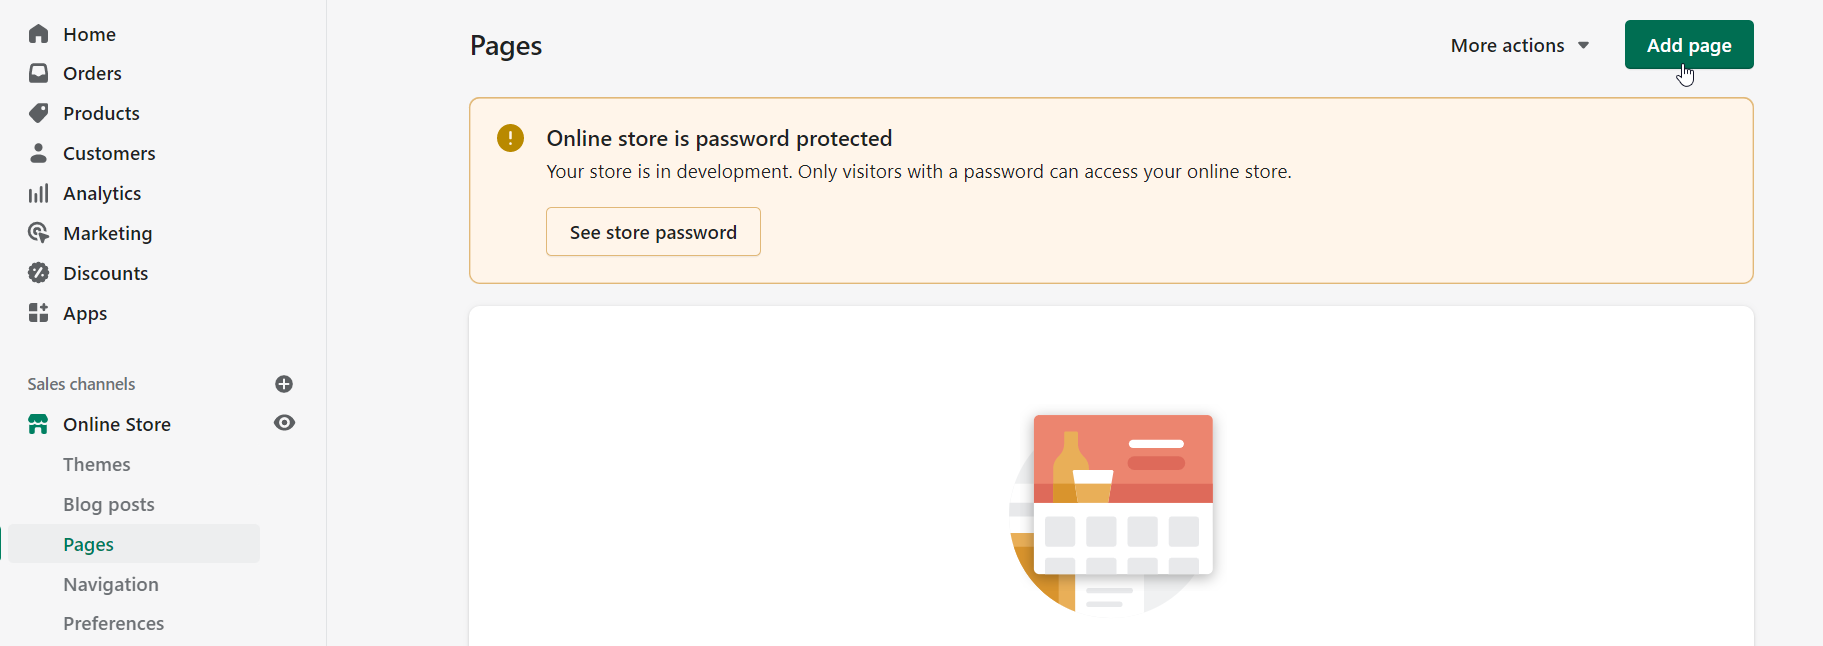
This step-by-step guide walks your through creating custom pages in your online Shopify store.

Audience

This guide is intended for intermediate Shopify Merchants.

Timeline

  • Prep: 10 minutes
  • Steps: 10 minutes
  • Total: 20 minutes

Tools

Results

  • Add Custom Pages in your online Shopify store.

Step 1

Creating a Page Template

Step 2

Customizing Your New Page Template

Step 3

Assigning Your New Template to a Page

Step 4

Viewing Your Custom Page on the Front End of Shopify

Step 1

Creating a Page Template

From the dashboard, click Online Store > Customize to bring up the customizer.
Theme's page in the back-end of Shopify
Once the customizer loads in, click the drop-down at the top of the screen and select Pages > Create Template.
Clicking on create template under pages in the Shopify customizer
In the modal that appears, enter a name for your new page template and click Create Template.
adding a title to the new custom page template

Step 2

Customizing Your New Page Template

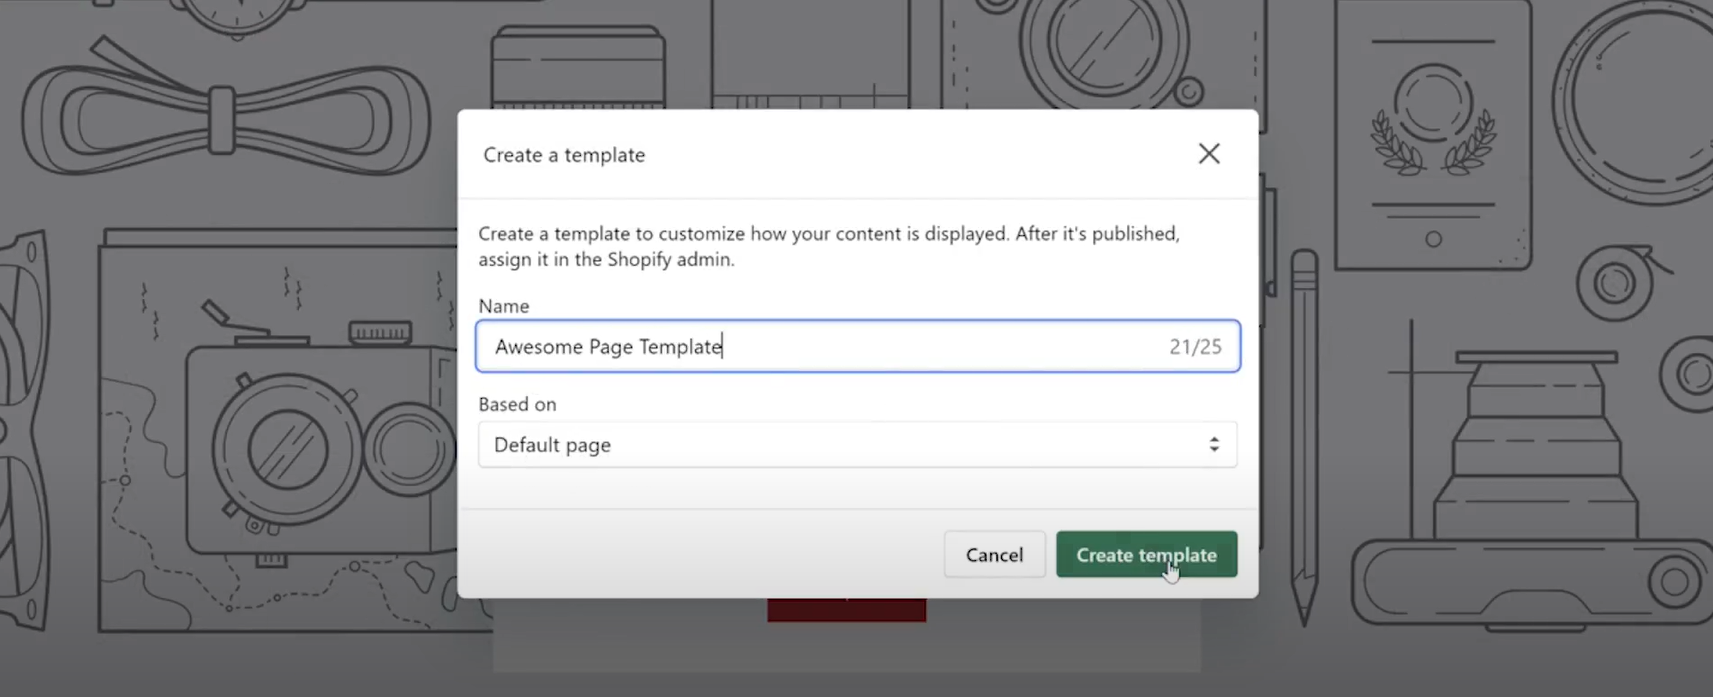
On the next page, you're able to customize your new page template. The page template has been created, but it doesn't have any content yet, so let's add some.

The first thing we recommend you do is to hide any content created in the classic editor by clicking the eye icon next to Page in the menu on the left-hand side of the screen.
Hiding content created in the classic editor by clicking the eye icon
With the content from the classic editor hidden, click Add Section to start adding sections and blocks.
Once you're happy with how your new page template is looking, click the Save button in the top right-hand corner of the screen.
Clicking on Save in the Shopify customizer

Step 3

Assigning Your New Template to a Page

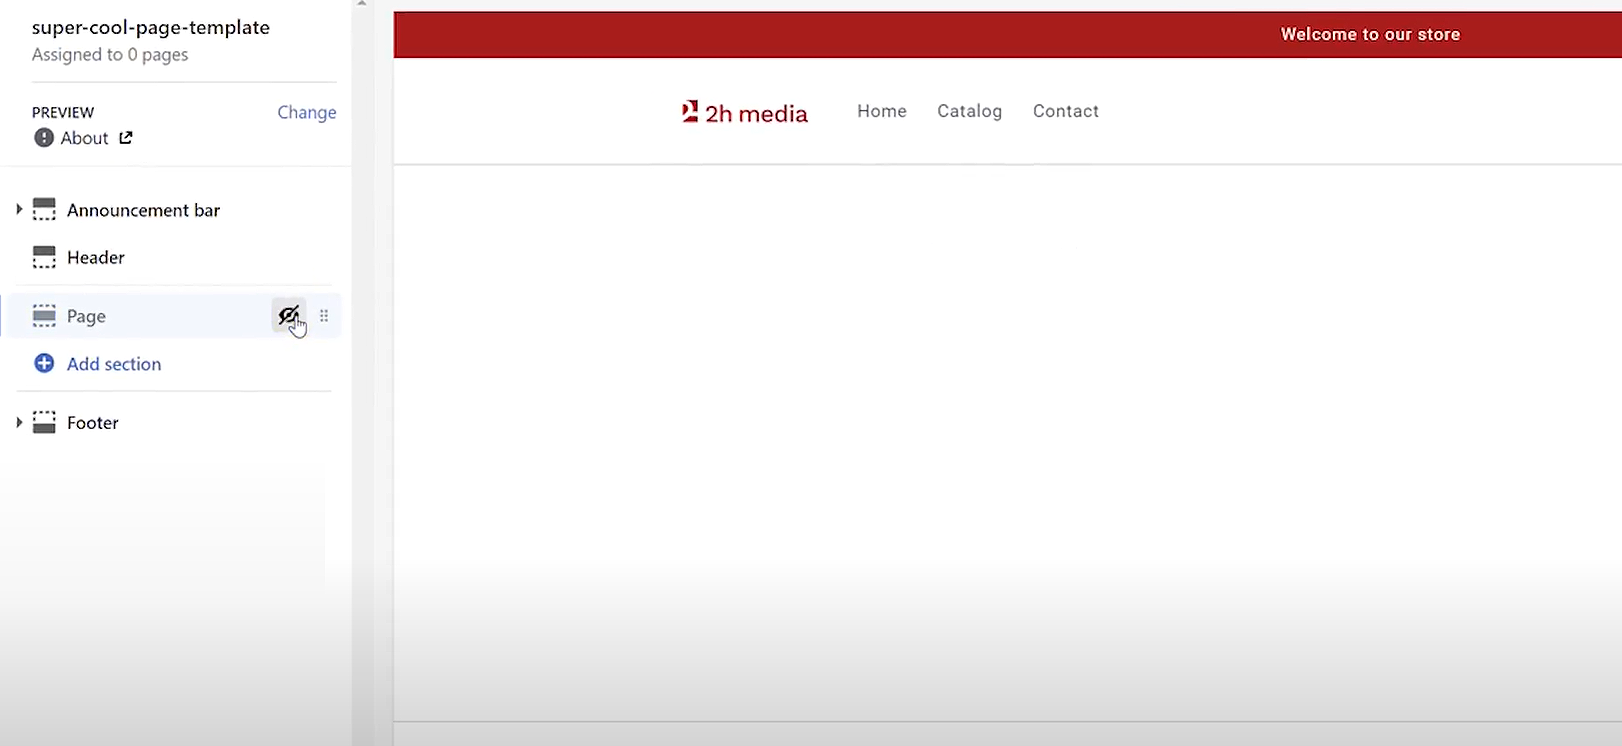
After creating your template, the next step is to assign it to a page in the backend of Shopify.

From the dashboard, click Online Store > Pages .
Click Add Page in the top right-hand corner of the screen.
Adding a new page in the back end of Shopify
Start by giving your page a title.
Then, select the new template from the drop-down on the bottom right hand corner of the screen.
Choosing a custom template to assign to a page
Click Save and your new page will be visible in the front end of Shopify.

Step 4

Viewing Your Custom Page on the Front End of Shopify

To see how your page looks on the front end, click the View Page link at the top of the screen.
Clicking on Preview page in Shopify
If you want to make your new page easy for your customers to find, you're going to have to add it to one of your store's menus. If you're not sure how to do that, check out our video on How to Create a Menu in Shopify.

Congratulations on completing this guide.

Want to continue improving your skills?
More Guides

This guide was written for 2H Media by Sara Varasteh with contributions by Aron Murch. Based on Shopify Online Store 2.0 | How to Add Custom Pages to Your Online Store. This guide is maintained by 2H Media.